Fixing WordPress upload error

When attempting to upload a big file in WordPress admin you might experience the following upload error:
Unexpected response from the server. The file may have been uploaded successfully. Check in the Media Library or reload the page.
Alternative error: 413 Request Entity Too Large
If your webserver is running PHP, nginx web server proxy, and Parallels Plesk as your server administration solution, the following tutorial may be helpful to solve that issue.
If you do not have access to your Plesk and/or server configuration you may want to ask your hosting provider to perform the desired setup for you. Feel free to link to this page.
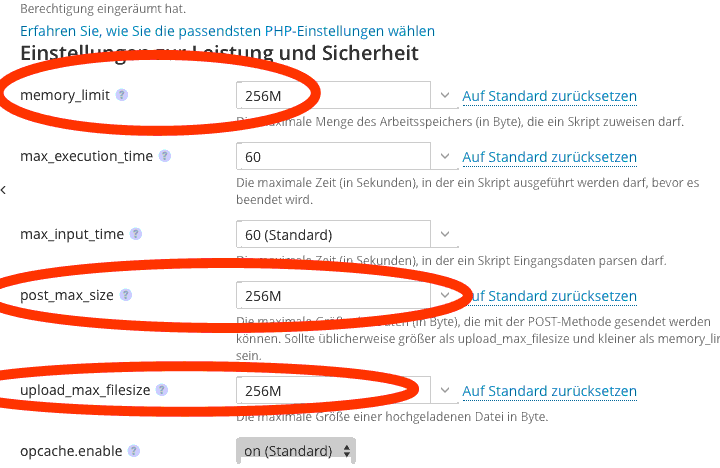
The scenario
We would like to upload an MP4 video file with a file size of about 200 megabyte and we’ve set up PHP accordingly:
If we were to upload the video straight from a post we are about to publish the upload would just be cancelled without any further notice. Because of that we try uploading the file via the media library and will receive the following message:
Unexpected response from the server. The file may have been uploaded successfully. Check in the Media Library or reload the page.
Of course we can already see that the file wasn’t uploaded. So what’s going on?
Finding the cause
It is quite easy to find out which part of our setup causes the issue, as Plesk logs access and errors to various files for our web. In the Plesk web interface of our web we click on Protocols to see entries and we will pretty soon come across one like this:

Got it! nginx is the one to blame – or at least to reconfigure. This reverse proxy service tells us that we tried to transmit a file that is just too big.
Fixing the WordPress upload error
Knowing the cause we are now able to fix the issue. nginx knows the configuration directive client_max_body_size, allowing us (even within Plesk web interface) to set this configuration for the Apache/nginx configuration. In theory. Attempting to do so fails and Plesk tells us that this directive is already set (globally and can’t be overwritten).
Now what?
Using a configuration file we tell Plesk to NOT set that directive globally:
Plesk can be configured via the panel.ini file. Running on Linux systems this file is located in /usr/local/psa/admin/conf if you already defined custom settings. If you haven’t touched Plesk configuration yet there may be no panel.ini file at all.
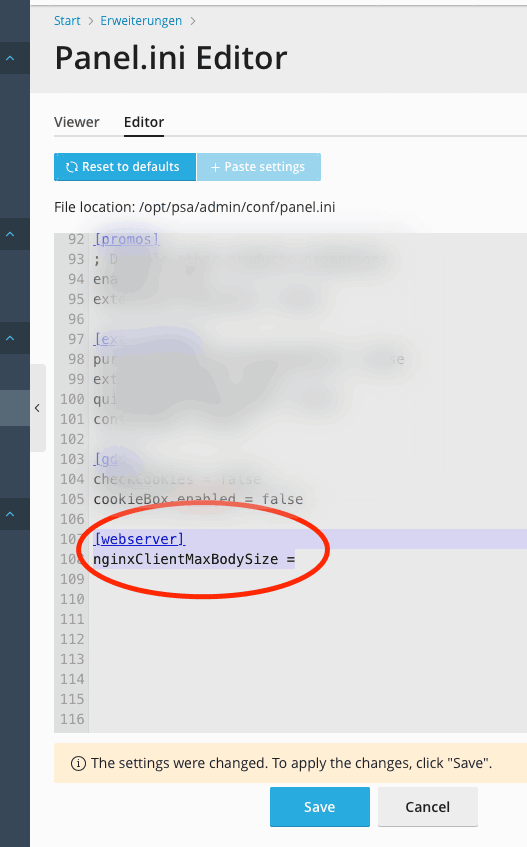
Within this file we are going to add a section [webserver] and assign an empty value to the nginxClientMaxBodySize directive to achieve that Plesk will not add a limit to this configuration to any virtual host on the server.
There are two possibilities to add that configuration to the /usr/local/psa/admin/conf/panel.ini file:
- via console / SSH connection to the server or
- with the „Panel.ini Editor“ Plesk extension
Option 1: Console / SSH connection
I assume you know how to connect to your server and how to edit plain text files.
In case there is no panel.ini file yet you can copy the sample one that comes with Plesk:
root@srv:~# cp /usr/local/psa/admin/conf/panel.ini.sample /usr/local/psa/admin/conf/panel.iniNow we add our configuration setting to the file. The last lines of panel.ini should look like this:
root@srv:~# tail /usr/local/psa/admin/conf/panel.ini -n 2
[webserver]
nginxClientMaxBodySize =
root@srv:~# _
Option 2: Panel.ini Editor Plesk extension
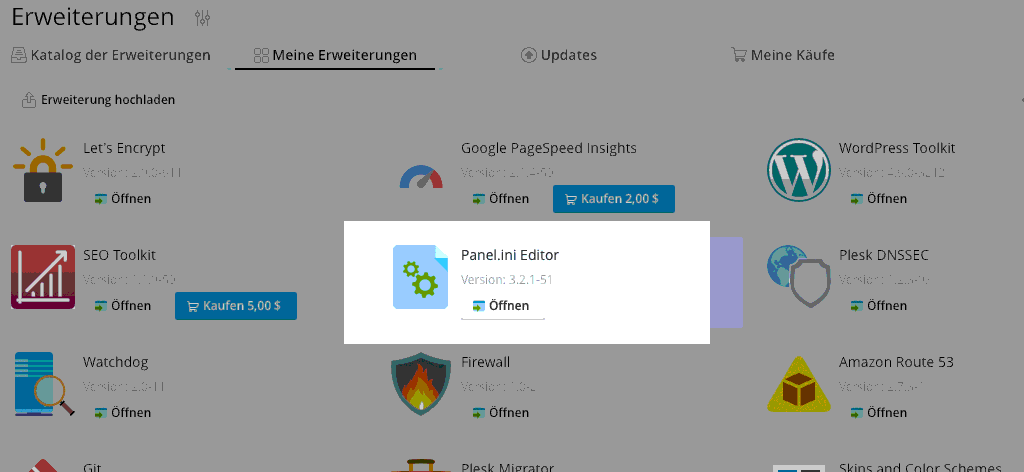
A comfortable approach in editing Plesk configuration file panel.ini is the Panel.ini Editor extension which is available free of charge from within the extension manager. With this extension we are able to add our configuration directive as well:
Writing new configuration and restarting service
Via the console we are telling Plesk to rewrite the configuration of the web services:
root@srv:~# plesk sbin httpdmng --reconfigure-allNow we are restarting nginx, to re-read and use the new configuration:
root@srv:~# service nginx restartSet client_max_body_size individually
Last but not least we set our desired limit to actually fix the WordPress upload error. As in our chosen scenario the file has a size of about 200 MB we want to define an nginx limit of 256 MB (coders just love power of twos ;))
Within Plesk we go to the Settings for Apache & nginx for our website:

On the following page, at the very bottom, there is a section for additional nginx directives with a text box. This text box is the place to add our custom size limit:

Now we just click the “OK” button and have the…
Problem solved!
Did it work for your issue as well? Congrats! I am happy about your feedback!
If you ran into other issues or solved the problem with a different approach I would love to hear from you as well. Share your experience! 🙂
Pingback: Unexpected response from the server in Media Library screen